Computer Stuck on CTRL ALT DEL Screen
The problem of Computer Stuck on CTRL+ALT+DEL screen could be due to various reasons, ranging from the Keyboard not functioning properly to external attached devices causing problems on your computer. So let us move ahead and take a look at What to do, if Computer gets stuck on CTRL ALT DEL screen and you are unable to use the computer.
1. Make Sure the Keyboard is Working
Make sure that the Keyboard is connected properly to the computer. If you are using a Wireless keyboard, make sure that the batteries are not dead. Press the Caps Lock or the Num Lock keys and see if the lights on these keys are working. If they are not working, it is likely that the keyboard is damaged.
2. Restart Your Computer
A simple Restart can clear out minor software glitches and stuck files responsible for problems on your computer.
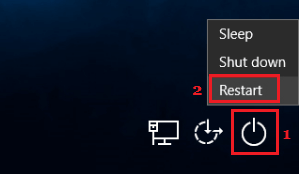
Click on the Power Icon located at the bottom right corner of your login screen and then click on Restart.
Wait for your computer to properly shut down and Restart again.
3. Unplug External Devices
Remove all the external devices connected to your computer and Restart the computer, either by pressing the Power button or clicking on the Power Icon located at the bottom right corner of your Login Screen.
Your computer should automatically come out of the CTRL+ALT+DEL screen, if the problem was being caused by an external device.
4. Hard Reset Computer
Follow the steps below to Hard Reset Computer.
- Power OFF the computer by pressing the Power button.
- Remove all the external devices plugged to your computer (Leave Keyboard and Mouse Connected) and Unplug the computer from its power source.
- Open the Battery Compartment and remove the battery as well.
- After removing the battery, press and hold the Power button on your computer for 15 seconds to drain residual charge (if any).
- Insert the Battery back into its compartment and Press the Power button to turn on the computer.
- On the startup menu, select Start Windows Normally option and press the Enter Key on the keyboard of your computer. Note: If your computer has a non-removable battery, press and hold the Power Button for 15 seconds and start your computer.
5. Use Startup Repair
If none of the above methods could fix the problem, you can try to find and fix problems on your computer using Startup Repair feature as available in Windows 10.
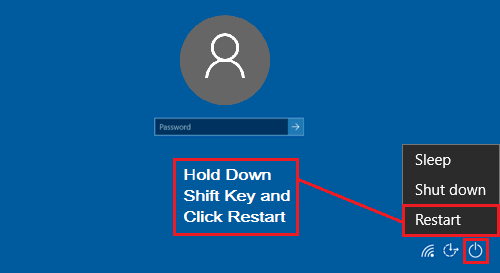
Press and Hold the Shift Key on the Keyboard of your computer > click on the Power Icon > and then click on the Restart option.
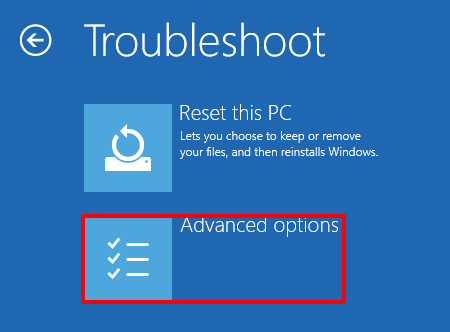
On the next two screens, click on Troubleshoot > Advanced Options.
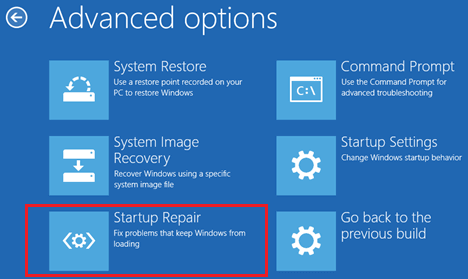
On the Advanced Options screen, click on Startup Repair option (See image below)
On the next screen, select your Account > Type your Admin Password and click on the Continue button.
Wait for your computer to scan, detect and fix problems on your computer. Note: If you see “Start Repair couldn’t repair your PC” message, it means that there is no problem on your computer and there is nothing that needs to be fixed.
Fix: Change Screen Saver Option Grayed Out in Windows 10 How to Enlarge Cursor and Change Mouse Pointer in Windows 10


